Adding ribbon to a Christmas tree can often be a challenge! Whether it is trying to decide which pattern and kind to use, or trying to get it to hang just right, it can be pretty frustrating. I had struggled with this for many years, and I thought I would pass along the tips and tricks that I picked up along the way! You can see the rest of my tree decorating tips and tricks HERE.
Update: I made an in-depth video with step-by step instructions for adding ribbon to a tree HERE along with a couple of other how-to videos with tips for setting up and decorating a Christmas tree.
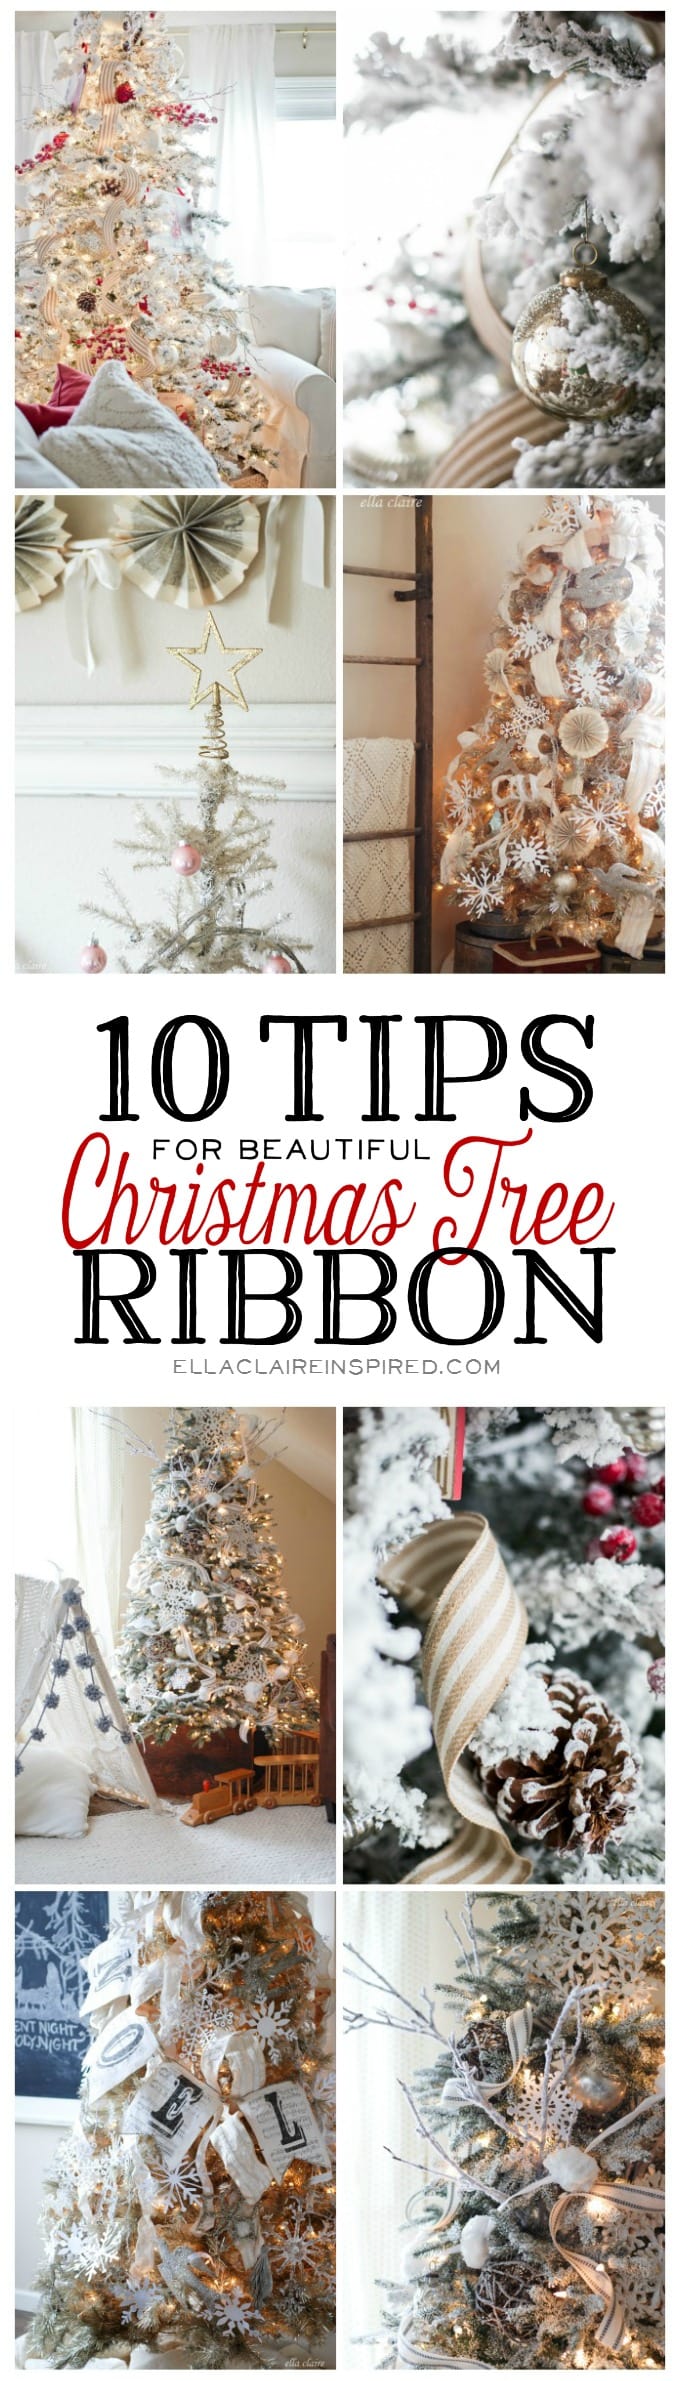
Here are my 10 best tips for beautiful Christmas tree ribbon:
Tip 1: Find the style and pattern that you love and this will be your jumping off point to coordinate other ribbons. There are so many types of ribbons out there (ex. wired, not wired, burlap, twill, grosgrain…). I know this sounds like common sense, and I don’t know if I am just picky or if we have don’t have much to choose from here, but I find it hard to find ribbon that I love. I usually look for the style and pattern that I like first, and then worry about usability later (twill, for instance is harder to use than wired).

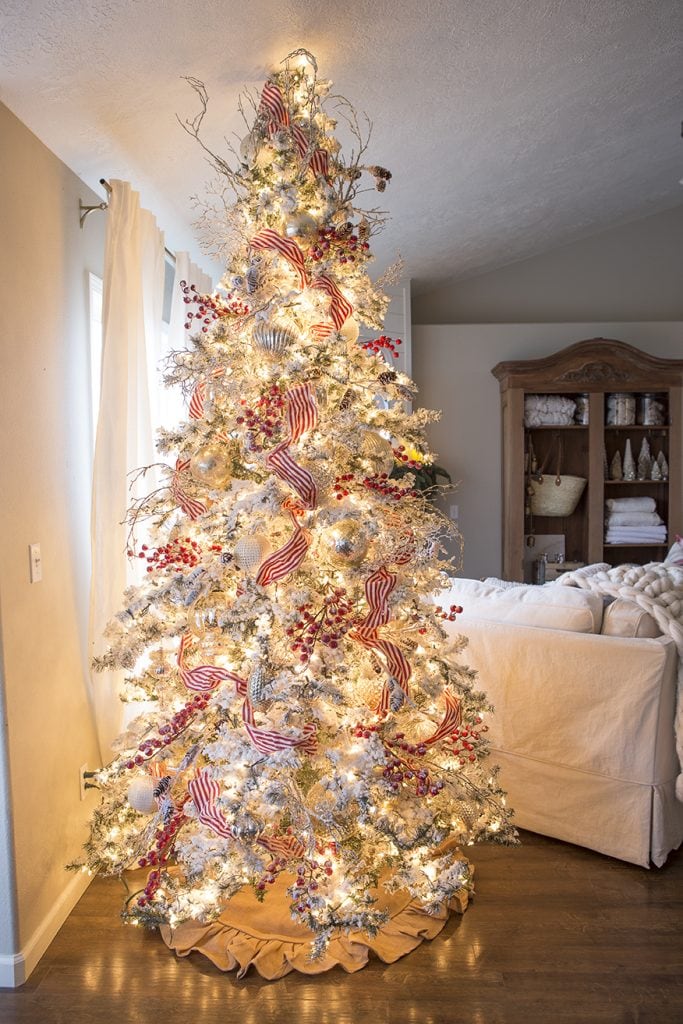
Tip 2: Wired ribbon is always easier but if you fall in love with a non-wired ribbon, try to mix in a coordinating wired ribbon. Wire isn’t necessary, but it is more durable if the tree gets bumped, and it is a lot easier to make it flow in the way you want it to. On my tree last year, I used a striped twill (purchased at Craft Warehouse. I know May Arts has this too) because I was (and am) madly in love with it. I mixed in the wrapping paper wired ribbon that I made, as well as a cream wired ribbon. It is all about the layering on a tree. It would have been too hard to ripple and tuck the twill, so I tied it into bows to give it a bigger impact. (similar burlap ribbon HERE)
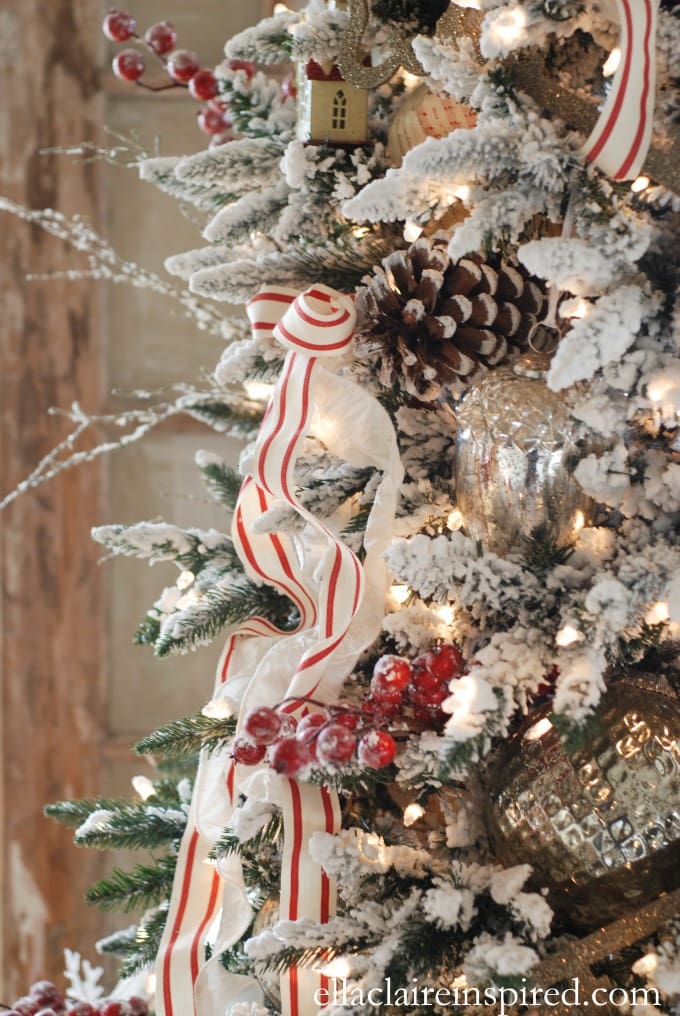
Tip 3: Consider scale when you are picking a size of ribbon to use. My tree was 9 feet when I picked out this 2 inch ribbon, which is normally too small. It would have looked pretty dinky and overwhelmed if I hadn’t paired it with the other 5 inch thick wrapping paper ribbon, and the 3 inch satin cream ribbon. You can use big ribbon on small trees, but it is a little trickier to use small ribbon on big trees.
UPDATE: I made an in-depth video with step-by step instructions for adding ribbon to a tree HERE along with a couple of other how-to videos with tips for setting up and decorating a Christmas tree.
Tip 4: If you are going to get trendy with your tree, make it with the ribbon. My recommendation is to begin a collection of ornaments that you love, that are relatively neutral, and that will last you a long time. Mercury glass is mine. I LOVE my mercury glass. I am so in love with it that I will most likely always love it. I think it is nice to always have this base to work with, and if you want to get trendy, you can always do it with a few ornaments and the ribbon. Ribbon is a pretty easy change if you end up wanting to go in a different direction in the future.
Tip 5: Use your Coupons. It seems that I usually use between 2 and 3 spools (10 yards each) of ribbon for each of my trees. Ribbon adds such a luxe elegance to a tree, so it is important to not skimp. Ribbon can get expensive, so I recommend using your coupons when you can. That way you can get the amount that you need without having to skimp on the quantity.
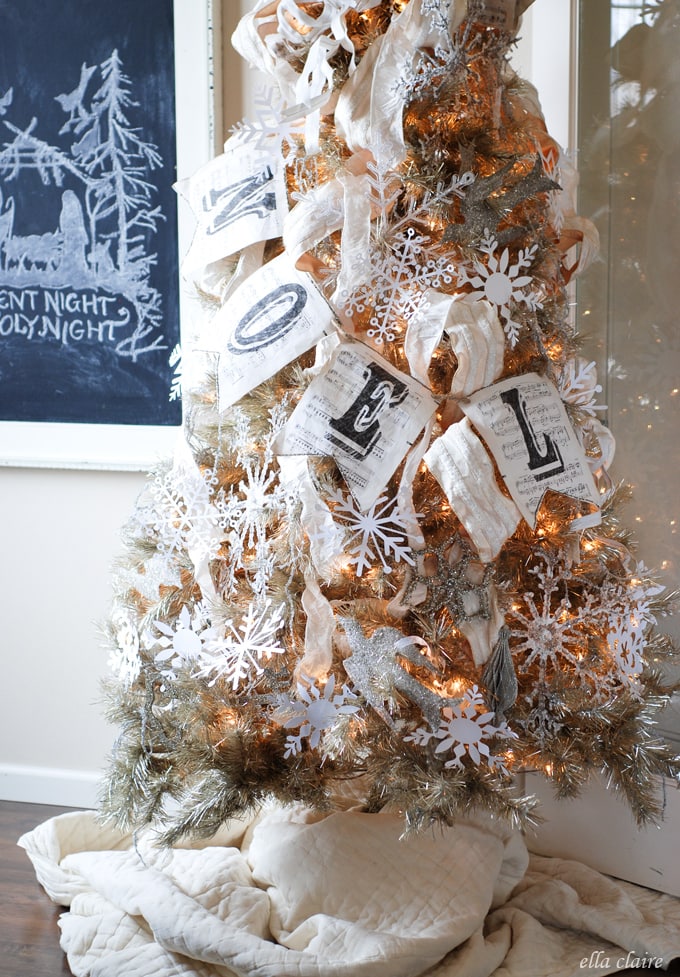
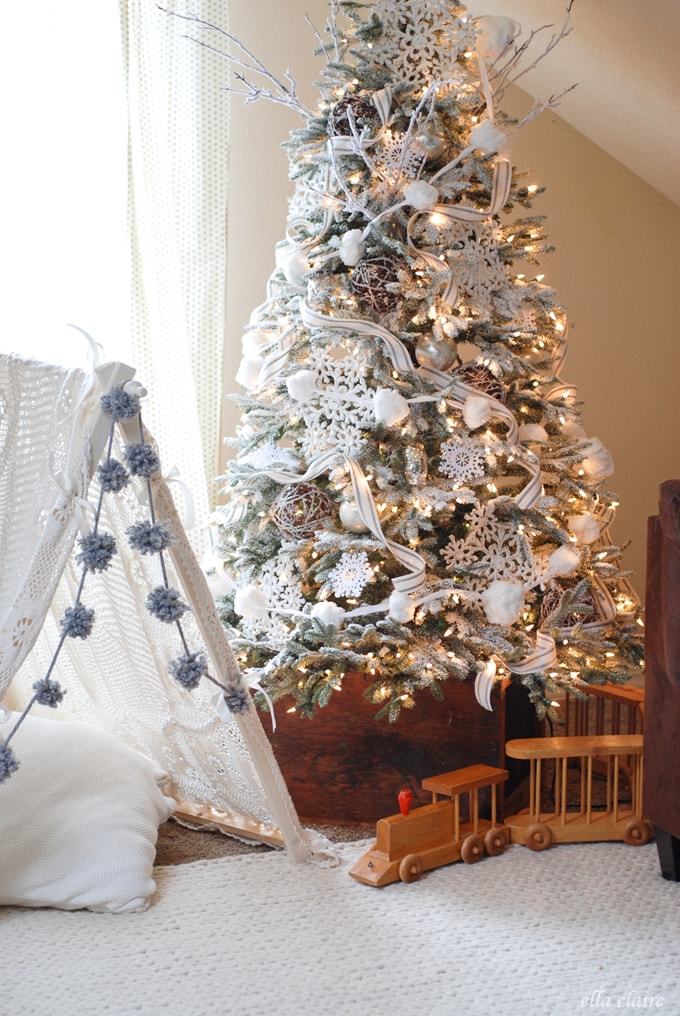
Tip 6: Be creative! I put garlands, buntings, flags, crystal ropes, sparkly wrap things, tulle, feather boas, etc. all in the ribbon category as well. If there is something that really catches your eye or that you really love, build your other choices around that one. One year I used fabric that I had on hand that I ripped into strips because we didn’t really have it in the budget to buy a bunch of Christmas decor, and I loved the way it looked.
Tip 7: Don’t be afraid to CUT your ribbon! I promise it will be ok! I used to be that person who would try to keep the whole entire roll in tact when I was decorating my tree so I wouldn’t have to cut it up… you know, in case I needed it for something else someday. Heaven forbid I ruing it. I am telling you, CUT IT! It will make your life so much easier to have smaller, more manageable lengths to work with. In the end, you will be able to play with it so much easier and manipulate it to look the way you want it to. I actually love to cut mine into 5- 6 foot lengths and weave them in and out of the tree. You can always tuck the end into the tree and start a new piece if it ends up being too short. Trust me on this one.
Tip 8: Applying the ribbon to your tree is all about the timing. A lot of people say that their ribbon has to be done first or last, or wherever they have it in their routine, but I say do it where it makes sense. I talked in more detail about the order I used for decorating my trees HERE, or you can see a video tutorial HERE, but the general order I use is like this:
- Picks/twigs
- Big/Huge objects (ex. my wooden sign postcards)
- Big ornaments
- ribbon
- small ornaments
Basically, you want to establish a good base for your tree with the twigs and picks, bigger items, and bigger ornaments (P.S. if you are scared of big ornaments, jump in and get some! The different sizes add a lot of visual interest to your tree!). Think of this as preparing your canvas. Then go for it with your ribbon. Loop,tuck, bend, cascade, wave, etc. See more in my step-by-step video tutorial HERE. Your finishing touch should be your smaller ornaments. It is way too hard to put your ribbon on completely first because it will get ruined. Likewise, if you wait until the very end, you won’t have that pretty layering with some of the smaller ornaments hanging over the ribbon in places. Next year when I decorate my trees, I will try to make a video to show how I do this.
Tip 9: Perfection is overrated. Maybe that should be the motto for my life. We should all print that out and stick it on our refrigerators as a reminder! When it comes to ribbon, I think that if it looks too perfect, there isn’t enough organic playfulness about it and it lacks visual interest. It also appears a bit heavy. So, when you are cascading your ribbons down your tree, try to bounce them here and there instead of going in a straight line down the entire length of the tree. Flip them around, bounce them around, over, under the other layers, let an end stick out here or there, change directions, etc. Go with your gut. If you feel like you need more, add more. If it is looking too perfect, switch it up a little. If it is feeling too heavy, take some ribbon off of your tree.
There are many different ways to drape ribbon, but these are my favorites:
- Cascading vertically from top to bottom- The trick here is to tuck, bed, loop, etc without it being too perfect, too straight, etc. Just picture your ribbon is bouncing around. When you tuck the part into the tree, bend it and make a crease so it sits nicely into the branches. If you are still having a hard time keeping it in place, consider securing with pipe cleaners or twist ties. (Ribbon on left, striped burlap, Craft Warehouse | Ribbon on right Tai pan, sparkle garlands Target)
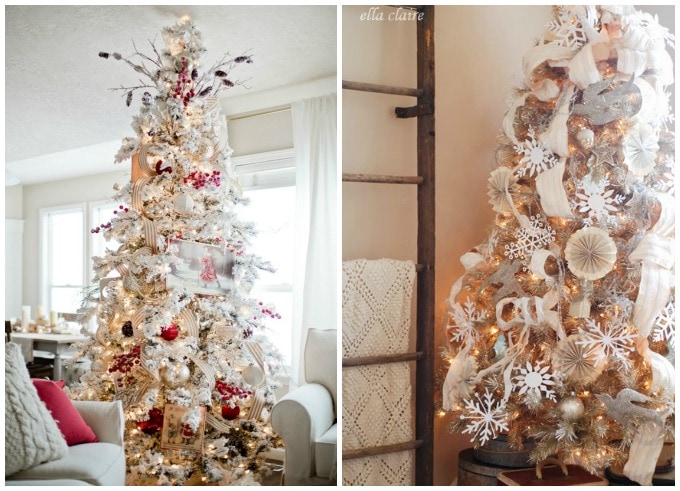
- Draping horizontally- You can see the general directions of the garlands of this tree are horizontal- S- shaped. I put on the snowball garland first and mimicked the same movement with the coordinating ribbon, allowing for a very fluid and natural movement and draping. (ribbon, michaels | snowball garland made by me, tutorial coming)
- Clusters. I haven’t done a tree like this in a while, but Heidi, from Home by Heidi, does this really well. You can see her tree HERE and her ribobon tutorial HERE. She also did an adorable candy cane tree.

Tip 10: Step away from the tree. Just walk away for a while. Resist the urge to do, redo, redo, redo and redo again. Coming from a chronic perfectionist, take my advice and walk away! You know those times where you are looking at a word and all of a sudden it just doesn’t look right, and you are wondering if that is really how it is spelled? The same goes for your tree. If you look at anything too long, you will think it looks weird. Walk away, and come back later. When seeing it with fresh eyes, you will be able to see what works and what needs to be reworked.

Don’t forget to see my Christmas Tree Decorating Tips & Tricks HERE!
Yorumlar
Yorum Gönder